

Over 90% of couples hire a photographer for their wedding — so how do you make sure your photos are unique? One way to make it feel special is to use long exposure sparkler writing. Light painting with sparklers allows you to draw a design or word with a sparkler and have it show up in a gorgeous glowing photo. Your design will show up clear while the writer is artistically blurred.
It can be a tricky process, but it is so worth it when you get it right. Today, we'll go over how to write with sparklers and some photography tricks with sparklers. We'll discuss the backdrop you need, your camera settings and what makes your sparkler writing photos stand out.
Setting the Perfect Stage
Sparkler messages require specific camera settings and a particular setup, so you'll need to coordinate this with the wedding party. You'll need to set up long shutter speeds, which requires a tripod to keep the subject in focus, and you also need to create a specific exposure environment. There are a lot of requirements when doing sparkler photography, and the setting is a significant part of that. It helps to provide the location ahead of time, so all parties can plan accordingly.
Items in the background don't matter too much, as long as there are no bright light sources that will pull attention from the sparklers and add bright points of exposure. Obviously, it also needs to be dark outside, so the sparklers show up. You'll want to make sure that you are far enough away from other festivities and decorations that could ignite from the sparklers. Of course, safety is a top concern, for the sparkler writers, photographer and the guests.
Your subjects can dress mostly however they want, with one exception. When someone writes out a word in front of them, it shows up reversed in the camera, which will make it unintelligible. There are two ways you can address this fact, one of which requires you to pay attention to what the subject is wearing:
- Flip the image: This method is easier on your subjects and might be better to use with kids. They can write the word or image out in front of them like normal and you will flip the image after taking it. If you choose this route, your subjects should avoid logos or words on their clothing, as they will show up reversed in the final product. Most wedding attire is free of these anyway, so it shouldn't be too hard to avoid.
- Write backward: For this method, your writers will need a little skill and some practice. If they write the word in reverse, it will show up correctly in the final image. Subjects can wear whatever they want.
What You Need
The items you need for long exposure sparkler pictures are fairly common in any photographer's arsenal. They include:
- Camera: You will need a camera that can shoot in manual exposure with adjustable shutter speed. This is usually a DSLR camera, where nearly all of the settings are adjustable. Without adjusting the shutter speed, you cannot get sparkler writing, but you may still be able to take sparkler photos. If taking pictures on a modern smartphone, you can usually tap on the subject's face to adjust the exposure accordingly.
- A tripod: With the slow shutter speed of sparkler photography, the slightest shake will make blurs apparent in a photo. If there is a remote shutter option on your camera, using it is a great way to keep it steady and avoid the shake of pressing the button.
- A wide, open space: Remember you need plenty of room for this activity.
- Sparklers: Of course, you can't write in light without a source. We offer 10-inch sparklers that are appropriate for light writing.
- Time to practice: Sparkler writing can be tricky. You need to know the correct settings, and the writers need to know how quickly to write. Practicing before will help you make the most of your photography session.
Camera Settings
The most significant part of your camera's settings is the shutter speed. Most pictures will use speeds of a fraction of a second. For sparkler photography, you want this to be much longer, at least several seconds long. Around five seconds is a good place to start, but you can extend this if you need to allow your subjects enough time to write what they need to.
- Stabilization: Again, you'll need to have a way to stabilize your camera. Usually, this is a tripod, but if you're in a pinch, you can get creative and find things to rest your camera on. A chair, a table or a stack of nearby objects could work as a makeshift tripod, but be careful — you don't want to knock your camera off.
- Focus: You can choose to focus on your people or the sparklers. People can be easier, especially if they'll be staying in one spot, but because of the long exposure, they'll be slightly blurred anyway. Since they're so bright, the sparklers should remain in focus.
- Shutter speed: Shutter speed can vary widely depending on your preference and design, but a good starting point is about four or five seconds.
- ISO: You can keep your ISO relatively low. The sparklers are quite bright on their own. It will depend on ambient lighting and your environment, but try starting with ISO 400. Any background lighting or white features will show up brighter in the overexposed picture, so try to keep them to a minimum.
- Aperture: Your aperture can stay around F8, which should give you a nice depth of field.
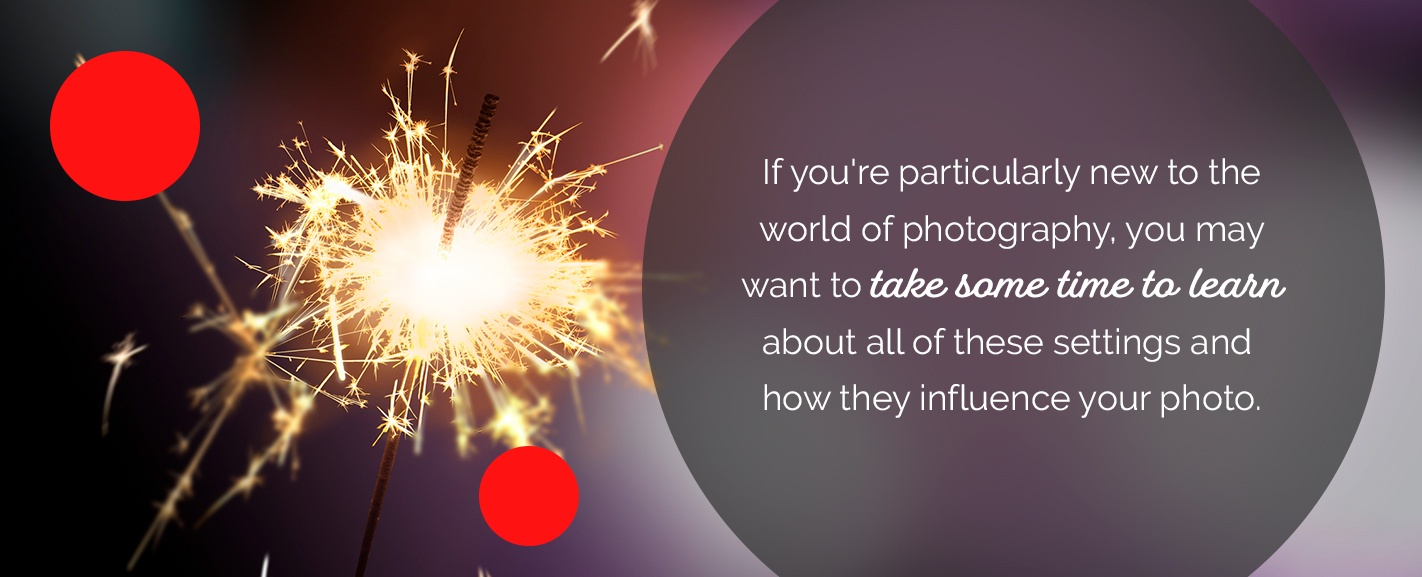
Don't forget that you'll need to experiment. These suggestions are just starting points, as your individual environment and needs can dictate alternative settings, especially since each setting can affect different aspects of the photo. If you're particularly new to the world of photography, you may want to take some time to learn about all of these settings and how they influence your photo.
Practice, Edit and Shoot
Spend some time with your subjects before the wedding day to find the right settings and get your subjects used to the process. They'll need to write their message quickly, and the process can go faster if they know what they want to do beforehand. After all, the wedding day is a hectic experience, so anything you can do ahead of time to smooth it out is a big help. If you have access to the area of the venue you want to work in, try to go there, so you can adjust for ambient lighting and know what your location will offer.
Practicing ahead of time also allows you to see the results in editing — a very different review than being in the field. You can adjust your approach as needed after you see the pictures from your practice session. Editing can make a significant difference in the results, as well. You will most likely want to make your background darker and your sparkler lights brighter for added contrast. You can also adjust the tone of your sparklers if the color isn't exactly to your liking.
Finally, on the big day, pull your subjects aside from the festivities and encourage them to have fun with it. They can write the couple's last name, the date, make shapes with the sparklers and so much more. The sky's the limit with sparkler photography. Get creative and ask your couple to do the same.
Your Sparkler Source for Wedding Photography

One important tip for photographing sparklers at a wedding? Get a lot of sparklers. Between practice sessions, multiple takes and all the designs you have in mind, you'll go through quite a few of them. SparklersOnline is your source for wedding sparklers. We offer cases of high-quality sparklers at affordable prices that can fit any wedding budget.
If you want to do other sparkler-related activities like a send-off or more photos, we have longer 20- and 36-inch wedding sparklers, along with unique heart-shaped sparklers for an extra romantic touch. Browse our sparklers today to find the perfect option for the big day.